Ever since moving here to Japan last summer, I've known that earthquakes will be a problem. As a result of that, most all of my model horses have been packed away this whole past year.
In the process of getting the studio organized over the past month or so, all of the horses had to come out. Off and on over this past year I had tried to make some sort of holders for my herd of Stablemates - the ones I was most worried about suffering damage in a 'quake - but I wasn't able to come up with something that I liked and that I thought I could easily mass produce.
Under pressure to FINALLY get everything unpacked and make "home" for everything during the great organizing quest, I had to stop hemming and hawing and make holders for the tiny herd. I wanted to come with with something fancy, made out of wood - and I still do - but I wrestled once again with how I wanted it to look, how it should go together, what materials to use, etc. etc.
Suddenly, in a flash of brilliance, or desperation, I thought: why not use cardboard??
That led us to this.
I didn't quite mean for this post to be a step-by-step tutorial, but I did go ahead and document most of the process that I used. Maybe this will give someone else ideas on how to make their own tiny horse holders...
------------------------
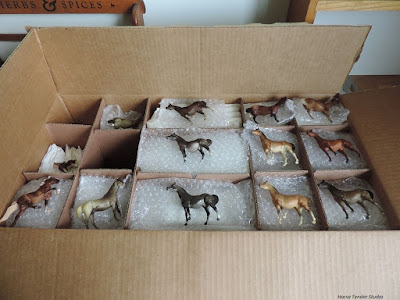
At last, the dish pack box that was so carefully packed up
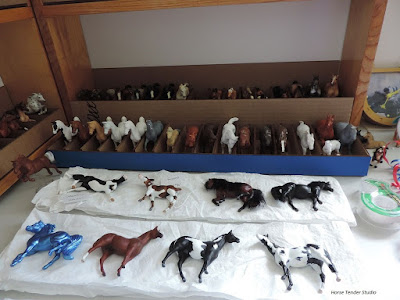
over a year ago was opened. Inside, a TON of Stablemates: OF, CM works in progress - along with some Safari horses, and random other tiny equines.
Eeeee! It's so good to see them again. Several of my GI Arab stallions here, including my beloved Solo (JCP SR rose grey).
Okay, on to the holders!
Tools used: scissors for any trimming needed, a ruler, pencil, scotch tape, and glue.
And of course: cardboard, lots of cardboard. I used our laser to cut the pieces out. It's wonderful to have the high tech awesomeness for my use, but I'm sure the cutting could also be done with scissors or a hobby knife (carefully!).
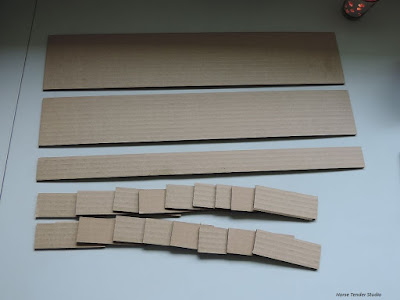
Here are the pieces that went into each holder. From top to bottom: the bottom, back, front, and 17 dividers - giving me 16 stalls per holder.
Necessary: glue. Optional equipment: supervisor cat. She inspects my glue bottle, seems a bit skeptical. I used regular old Elmer's glue.
Also optional: a candle or other desired creative ambiance, and a beverage of choice.
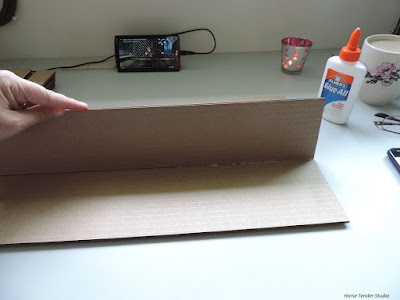
First step was to glue the back to the bottom. This was probably the trickiest step, having to align the whole length of it just right, with nothing else as a guide or to hold onto. In all of these steps, I didn't wait for the glue to dry, so that I could shift the pieces if I needed to. I just let it get tacky to where it was holding, but still flexible.
Then I glued on the side pieces (just two of the dividers), using them to square up the back piece.
Out comes the ruler and pencil.
I actually marked the center of the bottom piece and placed the center divider first, but I didn't take a picture of that.
Here are all dividers on one side put in...
... and here they are all glued in.
I found that a gap of 1.25 inches between dividers will fit almost all stablemate molds, except for a few of the newer ones. Those who needed wider stalls are the: G3 Andalusian (rearing) and G4 Reining. The G1 Drafter was almost too chubby to fit, but they did go into the regular stalls just fine.
Additionally, my holders were too short for the G3 Mustang (running) and G4 Hanoverian (extended trot). For all of them, I made one holder with a gap of about 2 inches in between dividers, to fit the wider molds and be able to put the longer molds in at an angle. I don't have every single SM mold to test sizes, but nearly!
Moving on, here is the front piece put on. I put the fronts in a bit of scotch tape "traction" until the glue died, or was mostly dry.
Here is one finished custom made tiny horse holder!
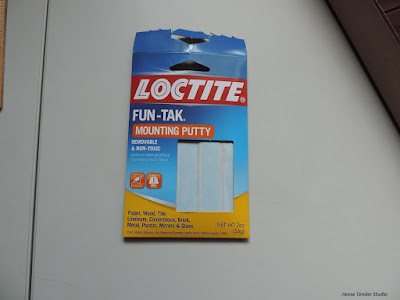
Next up, specifically with the dreaded earthquakes in mind, I used some of this stuff:
I put two small wads of it on each end of the shelf, front and back.
Then I set the holder in place and pushed down on the floor of each end stall. They are stuck on the shelves very nicely and certainly won't be able to slide off!
Fast forward several days and many hours later, all of the shelves have holders and all of my little herd are unpacked!
Over halfway through the entire project, I thought about painting them so they would look... less like cardboard. As an experiment, I painted one front piece. I think it looks nice and I'm considering going back and painting all of them. Of course it would have been easier to paint them during the construction process, versus once they are stuck to the shelves, but oh well. I can always use another project, right? .... Right?
Speaking of other projects, now that the tiny herd is secured, that leaves... the big'uns. My quick and dirty fix after unpacking them was to strap tape across the front of their shelves. They can still play dominoes right now, but at least they shouldn't be able to skydive off of the shelves in a quake. Next up will be to fashion holders for them.
