Wednesday, December 31, 2014

Farewell 2014 - Year of the Horse

I could probably sum everything up by saying that this year started on a low note, but is going out on a high one.

-------------------------------------

The year started with Jeff in Afghanistan and me just starting to learn how badly I'd injured my shoulder in late 2013.  A lot of things I was doing at the time had to be shelved, because of the injury - belly dancing lessons, dressage lessons, even taking care of Bo.  I had to have someone do that for me for a while.  It was hard to take, I'd wanted to do the dance and dressage lessons for many years and they were going well, then I had to stop everything.  But I started PT and, slowly, my shoulder started to come back.

Though off to a slow start, I did manage to have a few good crafty days early in the year.  I made more greeting cards and started back to work on a bunch of custom horses, some old, some new.


Then Jeff came home and everything was a lot better.
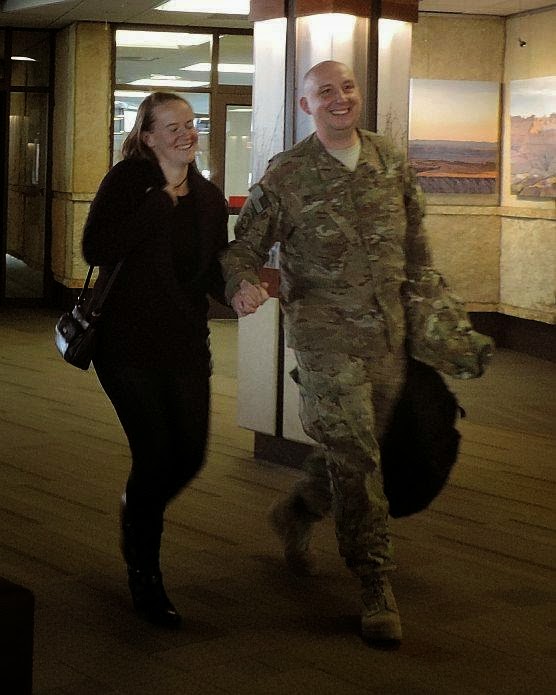

Joy and relief.


I worked on a couple of big projects during the year.  In March I started on my tatting entry for the Fair.  It would be a tatted American flag.


The flag ended up winning first place, Best in Show, and Best in Class at the Fair in August.  I was SO thrilled and what made it even better was that Jeff was there with me this time when I found out the results.   


I also put some time in on the Stagecoach project during the year, finishing up the front axle/5th wheel assembly...


... and the rear axle/chassis frame.  (all painted parts here, but it is assembled now)


I did quite a bit of cross-stitching this year, mainly on saddle pads.  I finished several new ones.   


In early October, we went on a trip to visit Jeff's family in PA/NY.  It was a working vacation of sorts, since we took our laser with us and I took a bunch of custom horses and supplies to work on.  The trip ended up being a turning point in my creative journey.  A change of scenery and people resulted in big strides for some of my projects, one in particular.  While there, I finished this horse.  This was a huge, terrifying step in the journey back, now it's behind me:


I returned to live showing, attending two shows this fall - the Black Hills Model Horse Show and the Mid-Ark Model Horse Expo.

I was brave and finally put several of my cross-stitch saddle pads up for sale at the Mid-Ark Expo.  I sold two of them there and one went on to be part of a Western Performance Championship entry that day!  It was so wonderful to see one of my little creations in action and I was honored to have been part of such a beautiful entry.


I met a lot of great people at both shows, made some new friends, had a lot of fun, and left very inspired to continue on with my journey.

The shows also marked the Grand Opening of our laser business.  They were the first places that we offered our laser cut and engraved items for sale at an event.  We had dog and horse signs and ornaments, and a brand new line of model horse inspired pieces too.  They were a big hit!


As the year wound down, I took part in just one "Black Friday" sale this year, at Tandy Leather.  I  stocked up on goods that I'll be using to start my adventure into tack making - and later...  I hope to finally get into performance showing.  *gasp!*


Of course throughout the year I spent a lot of time with Bo, including many early mornings where he and I had the whole barn to ourselves.  We had several great rides around the area, I even used him to run some errands - something I'd always thought would be fun to do.  We also did get back into doing some lessons and clinics toward the end of year and it was good to try and pick up where we left off a year ago.


Also, on the real horse front, I was able to audit a Buck Brannaman clinic.  He came to our area for a 4 day clinic and I was there every day from start to finish, taking a ton of notes and pictures.  It was a magical time and I loved listening to him.  I had the chance to talk to him a couple of times and he was a great guy.


All around, it has been a good year.  I had high hopes for this, The Year of the Horse, and I'm happy with how everything went.  Though it wasn't off to a great start, I'm thrilled with the events of particularly the last few months and I'm looking forward to 2015! 

Remember...


Tuesday, December 30, 2014

Tutorial Tuesday #1 - Finishing a Cross-Stitch Saddle Pad

This is my 150th post for my blog!  It is also my 30th post this month, on the 30th day.  I set a goal for myself at the beginning of December to do a blog post every. single. day. and I did it!  Granted, some of them weren't very substantial - a short text only recap of my day - but I'm happy I was able to stick with it.  I've heard it takes 30 days to make a habit and I'm hoping this is a new one that I've trained myself.  I like to blog, I do, it's just that I forget, I have a lot on my plate, things come up...  I suppose I've never really made it a priority - until now.  I'm excited and full of ideas for future posts, including this one which has been in my idea box for quite a while.

--------------------------------------------------------------------------------

Model horses have long been an interest of mine, I started collecting back at the age of 8 or 9 when my mom gave me her collection of old, well-played-with Breyers.  Along with an interest in the horses, came an interest in something for them to wear and throughout my childhood I came up with several interesting tack and blanket creations.  (I'd like to feature them in a future post - I do still have some of them)

Fast forward to adulthood and a growing interest in REAL, fancy model horse tack.  I was highly intrigued when I learned that people were making saddle pads by cross-stitching.  Cross-stitch is something else I've been doing for years and I was excited to try and combine the two interests. 

After I'd stitched my first couple of pads, I wasn't sure what to do them.  I did find a video tutorial on how to finish one and I followed the steps.  I'll try and show what I do, it is very similar to the method I had learned from the video.

(I had planned to share the video here, but now I can't seem to find it.)


First step is to remove the pad from the embroidery hoop or frame and trim the excess fabric away, leaving a few squares or so all around:


Then, carefully, trim out the corners of the fabric, like this:


You want to be really careful in the corners closest to the stitching that you don't nick the floss in the design:


Next up, glue the tabs of fabric down to the underside.  I use tacky glue, but I'd imagine a lot of different glues would work.  I glue one side at a time and press the tabs down until the glue holds:


Then comes the felt backing.  Some people don't do this step and it results in a thinner, more flexible pad, but I like the felt; it gives the pad a finished look and to me it better replicates a real saddle pad.  No felt would be more like a saddle blanket.

I cut a piece of felt a little bigger than I need:


Spread glue around on the bottom of the pad, making sure to run a thin bead along all of the edges:


Lay the felt on, making sure you have some hanging off the edge.  Press the felt down, particularly around all of the edges:


Flip the pad over and press it, glue side down, onto the felt.  If you want you can set a book on it for a little while, but this isn't usually needed.  The glue will dry fairly quickly:


After the glue is dried, the extra felt can be trimmed away.  Again, be very careful not to nick the embroidery floss of the stitching.  I just cut in straight lines along the edges.  If doing a cut back design, like this one, a little extra care is needed in that area.  Small, sharp scissors are a big help:


That's about it!  I do put a stitched tag on the underside of my finished pads, recessed into the felt.  It is a way I came up with to "sign" my work after I'd made my first few pads.


All that's left now is to saddle up one of your favorite models! 


You like my imaginary saddle?  It's pretty slick, eh?  (haha)

(Saddle construction to begin soon... )


Monday, December 29, 2014

Motivation Monday - New Years

A new year is right around the corner.  Many people use this time to make resolutions and decide to change, to be better, to be happier.  I say you don't need a new year to make those decisions - you can choose to be better, to be happy, to live, at anytime.  (Goodness knows I'm trying to work on that kind of stuff all the time)  However, I did just come across this article and I wanted to share it today, in addition to my usual posting of motivational pictures.  I know that for me, 2015 is going to bring some HUGE changes - including a move halfway around the world.  I am looking forward to what's ahead (even if it is scary).

The article:
How To Begin Rebuilding Your Life And Making It Ridiculously Amazing


Sunday, December 28, 2014

Christmas Lights Tour

Here are some pictures of Christmas lights from our local area...  There is one house we try and see each time we do this where they have a TON of lights set to music.  It is a really neat show to see.  I took some stills here and also took a few videos.  I might have to see if I can share those somehow.