Showing posts with label in progress. Show all posts

Tuesday, January 30, 2024

A Morning In The Studio

I keep thinking it would be fun to do a video where I do a "day in the life" type of thing, or even jst share my morning routine.  Video is still something I struggle with - though it's on my (crowded) short list of things to work on.  So how about a bit of a photo essay, instead?


After coffee, first things first, it's down the hallway to the studio.  This hallway has an "overflow" shelf of fabric, floss, projects, and some of my tatting things. 


Cracking open the door to the cave of wonders!


My routine for a little while has been this: after entering the studio, I turn on the light, and change the daily horse calendar.  


It's neat to see what the day's horse will be and it's usually inspiring (some of the pictures aren't great, but most are interesting).  Today's horse is fun!  


After checking out the horse(s) of the day, I generally reacquaint myself with how I left things the day before.

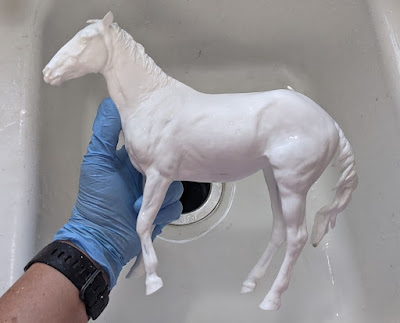
Right, this guy got a bath yesterday, in preparation to prime him.  


He is the Wycked Wynd resin, by Morgen Kilbourn.  I chose him to be my horse for this years NaMoPaiMo.  I'll be painting him chestnut.  Yesterday, after making the final selection, taking my entry selfie, he got a bath.  I also bathed another horse and planned to primer both of them last night.  Unfortunately, it seemed I got a bit of water in "Wynd", through the airhole, so he had to dry overnight.  

So, this morning's status was that he needed that coat of primer.

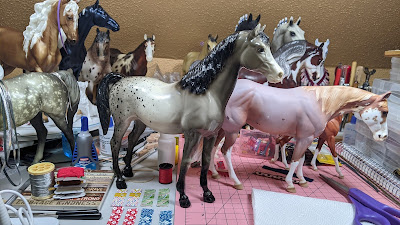
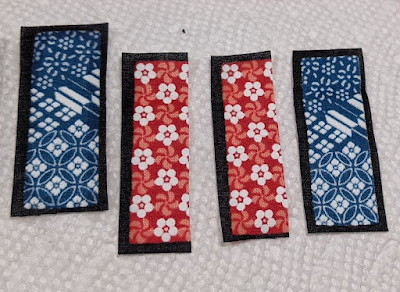
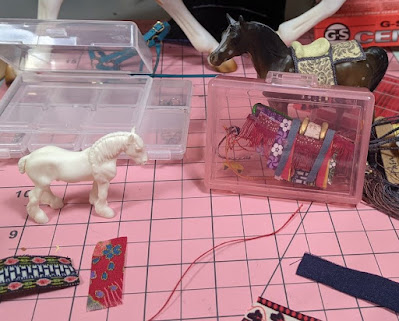
Over on the tack desk, I was working on two brown leather halters, sized on the Duende mold.
 

They are very close to being done.  I just have to attach the throatlatches on the other side, and put on the chin/under jaw pieces.  


I'm experimenting with a way of "speed building" halters and it seems to be working.  It's still not super fast, but I'm finding I can do multiples at once fairly easily.  I have a set of pieces to use as a guide when attaching hardware.  So I don't have to measure every single piece as I go, just do precise fitting toward the end - if that makes any sense.  

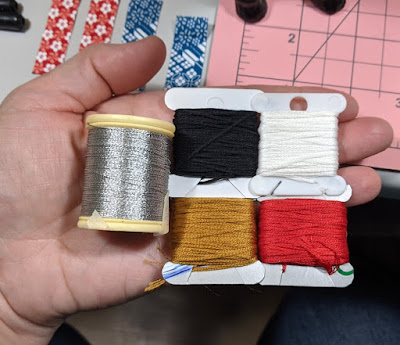
Last night, I also skived and prepped some lime green colored leather lace.  I plan to make a halter or two with this and also a lime green endurance set (halter bridle combo and breastplate or breast collar).


Another thing on today's plan is to start rearranging the chaos on the painting desk.  


I'd like to move my latop over there and make space for the workshop that starts Thursday evening. 

That is the Introduction to Oil Painting class held by Equine Art by Heather Bullach.  The color for the class is black, a favorite color of mine.  Some of yo may know that I took this class last year, too...  Yep, I got all of the supplies, tuned in for, I think, two of the Zoom sessions, but missed the rest.  I didn't ever actually start, because oils scare me, they still scared me and so...  yeah.  Take two!

This morning I took a quick glance at the painting chaos to see if those supplies are still handy.  Yep, there they are.  


The only thing not there are the brushes, which are in a drawer nearby.

I'm *still* scared of oils, but I'm going to go for it anyway.  

Okay, plan for the morning made, time to prime that horse!

This is my favorite primer.  I get it at O'Reilly Auto Parts.  It comes in several colors and I have all of them (black, dark grey, light grey, white, and this red).  Since Wynd will be a chestnut, I'm going with red primer.  


Out to the garage I went, after shaking the can for a few minutes....  And back in I came, because this can won't spray.    


I had a fuzzy memory of this happening before - probably with this can!  So I noted the problem on the can lid this time.  The nozzle might be fixable, or I might just take the can in for disposal, but at least I'll know now which can is the problem child.  


Moving on!  Brand new can of red primer deployed, shaken for a few minutes, back out into the garage with us.

After spraying, he spent a few minutes in the garage, then I moved him down to the basement to finish drying.  It's warmer than outside in the garage, but still cold.  


In the basement was the Dani model that I bathed and primed last night.  She will be my black oils horse.  She needs a tiny bit more prep, which I plan to do today.  


She most likely won't be perfectly prepped in time for the class, but that's fine.  I'm really trying to work on the idea of "progress, not perfection".  

After parking Wynd in the basement and bringing Dani up to the studio, I had breakfast, and did a couple of social media posts (I'm trying to get better about remembering to do that).

Instagram:


Facebook:


(And I'm also writing this blog post!)

I took a late morning break to go do my farm chores: feed Bo, let the chickens out, and check on everyone out there.  A friend stopped by briefly on her way to town.  She brought back a couple of egg cartons, a piece of blueberry bar she baked, and we had brief chat about the ups and downs of being a self employed maker.  She does incredible wood working and we have talked about doing some laser collaborations.

After I hit "publish" here, I need to box up an order from my Etsy shop and head to the post office.  I sold a classic scale western bridle!  


That's what went on this morning in the studio!  

Thursday, January 26, 2023

Quietly Very Busy

Sometimes, when I go quiet on here, or on my social media accounts, I'm not up to much. 

Oh, who am I kidding, I'm ALWAYS up to something, or a bunch of somethings, but I suppose I mean model horse type stuff, in particular. 

Lately, however, I have been up to a LOT in that category.  

The year started off rough, I was quite sick for a couple of weeks and it was hard to go from having so many plans for the New Year, to not being able to do, well, anything.  I feel like I've more than made up for it with a flurry of activity over the two weeks.

I have prepped about 50 horses for paint... seriously.  Usually, I dislike prepping, greatly.  My biggest problem is that it never feels like it's done.  I feel like you just have to reach a point where it's "good enough".  Once in a while, though, I get in the mood to prep and when that happens, I try to do a bunch of it.  As a result, this time around, I've done initial prepping on about 50 horses, mostly stablemates, but a few traditionals, too. 


That's a Zafirah, Duende, and Constantia.  I have colors picked out for all three of them.  The horde of stablemates...  not so much, yet.  

I'll be washing and priming the prepped herd in the next several days and then looking them all over again.  I've also got a small herd already in primer that will join the flow for prep round two.

My plan is to start painting next week.  

Speaking of next week, I am signed up for my first Heather Bullach oil painting workshop.  For February, she is offering a workshop on painting black (one of my favorite horse colors, probably no surprise there).  The cost to join was less than her usual classes and so was the material list.  Not that her other workshops aren't worth it!  I have been wanting to take one for a while now, but kept talking myself out of it.  I didn't want to buy a bunch more stuff and learn (even more) things that I might not use again... which was a big deal, and realization, for me.  I couldn't turn this one down though.  My first supply order, and also my very first order from Dick Blick, came in yesterday.  One more supply order is due to arrive anytime (several brushes were sold out at Blick, so I think I found them elsewhere) and then I will be ready!

Oh, I need to prep a horse for the workshop.  I'm thinking about using the Constantia...  I have had plans to paint her a liver chestnut, but I do have two of her to paint, so... 

NaMoPaiMo is a different format this year, it's much more relaxed.  I don't have a horse picked out for it yet.  I definitely want to participate - I haven't missed a year yet, despite lots of bad things happening in February...  So far, my only theme has been to paint a resin, since otherwise I used to be intimidated by them.  I don't think I am anymore (thanks to Jennifer and NaMoPaiMo!).  However, I had been trying to focus on Breyers with this prep marathon.  I do have some resins to pick from, if I want to stick with my "theme", so I'll have to think that over during the next few days or so.  

Also, the last couple of weeks, I have been working on stablemate blankets.  When I started finally feeling a bit better, I decided to try something interesting and look for some random inspiration.  I have a horse-themed planner that I'd bought for this year.  I turned it to last week and the picture was of a horse wearing blanket.  Blankets, it was!  I have been mostly sold out of blankets for a little while,  so I figured a restock was in order anyhow.  I also have a bunch of fun new fabric I wanted to try.  So, I have cut out, sewn hip darts, and made straps for around 40 stablemate blankets!  They are basically done, except for putting the straps on.  

Check out the rainbow polka dot pattern on several of them!  When I found this fabric, I couldn't wait to use it.  I think these blankets are going to be SO cute.  


Whew, well, that's the latest!  As always, I hope to post here more often.  We shall see.  If you made it this far, thank you for reading!  I apologize for the sporadic posting.  It's not that I don't have anything to talk about, I actually have a ton, but often sitting down to write a post and format pictures just seems too much.  Or, I forget.  Life has been crazy lately, a really, really good crazy - I'm happier than I've been in a long, long time, but still... crazy and busy (in mostly good ways).  Thanks for hanging in here with me!  


Tuesday, February 1, 2022

NaMoPaiMo and News

Here's a bit of news from the studio for this past week or so.

A few days ago, I wandered through a few stores in town, including an antique mall that I had forgotten about, and my favorite used book store.  In the antique mall, I found a bunch of Breyer and Heartland horses scattered around, and I ended up buying this appaloosa FAM: 


She was in the best shape of the other HSOs (horse-shaped objects) and also the lowest price.  The old Family Arabians bring back nostalgia for me.  They were among some of the, well played with, herd I was given, which started my collection.  Someday, I hope to get Starlight, the Vintage Club Yasmin in that same color. 

Other recent new arrivals are Firefly and Hawkeye, standing behind the FAM.  I had fully intended to repaint them, but they are very nice.  It's not like I don't have a ton of other projects right now, so that's far from a priority.

I ended up taking on a commission for a western pleasure saddle pad, using these colors of floss.


I'm very excited for this project.  The doll that it is being made to match is a favorite of mine, ever since I saw the initial post about her from the doll maker.  After creating the pattern, based on a real pad the owner likes, stitching is well underway.  

Speaking of commissions, I'm also working on the second micro mini scale Chagu Chagu Ummako (Jingle horse) set, which was ordered by a friend.


I braided more thread and made more fringe.  Also started cutting out fabric strips.  We chatted on Skype and she liked these colors, red and blue.  


On the left here is the horse this one is being made for.  He is "Robin", sculpted by Horse and Bird Studio.  On the right is the first set I made, in front of the in progress stablemate Arabian regalia set.  Which suddenly looks big here.


Another bit of news is that I signed up for NaMoPaiMo.  This is the 6th year and I've been in every one.  I actually came close to deciding to skip this one.  I wasn't sure I was up to it.  Though I'm planning to go to BreyerWest at the end of the month and could CERTAINLY use the motivation and an "excuse" to be in the studio right now.

I chose to paint a traditional resin, Yerokayannie - or "Annie", from Hanna Bear of Bear Carousel.  As soon as she had arrived here last year, I decided I wanted to paint her as an appaloosa.  In particular, a varnish roan.  This is a color I've never done before, but I think I have a plan.  

First order of business, yesterday, was a bath for her.  Well, the first was actually a bit of prep, mostly some seam sanding.  Then I decided to get some primer on her, before continuing with prep, but she needed a scrub down first.


I reeeally didn't feel like doing the selfie this time around.  It's not a requirement, and I really don't like having my picture taken (by me or anyone), AND I'm perpetually tired these days.  In the end I did it anyway.  This was the best attempt, I thought.


Last night, she was primed.  This picture was after one side had been done.  


I love the effect that happens when one side is done and the lightest hint of primer spray comes around to the other side.  It's something I often take pictures of.

She's fully primed now and waiting in the studio for prepping to continue.

While I was at it, I decided to wash and prime a pile of medallions...
 

...and a few micro minis.  


Not the best pictures, I use the dank cellar as a spray booth.  I'm happy to have that option in the winter, the lighting just isn't great for pictures.  I may end up using a few of those as test pieces for Annie.  Most will end up being future sales pieces.

I'm happy it's (finally) February, but that means it's really time to get busy!
 

Tuesday, December 15, 2020

Back Aboard The Coach!


The last time I posted anything about my Epic Stagecoach project was...  Almost 6 years ago.  I have not touched it since then.

Well, that's not entirely true.

Last year, it made its live show debut.  How??  In the awesome Big Dreams class at The Jennifer Show, where it was the biggest dream - by footprint anyhow.  It, and all it's paraphernalia, took up an entire table. 


After that, it was all packed away again.  

Recently, I've made an effort in my "new" studio room (been in there for over a year, but it still feels new and not moved into) to set up a work station just for the Stagecoach.

Last night, I randomly sat down in the spot, cleared a few things out of the way, and got back to work.

In my last post about the project, I shared how one of the wheels had been shattered.  My plan has always been to use that as an "opportunity" to redo the wheels, having learned MUCH more about actual wheelwrighting since making them.  However, last night I made the decision to repair the broken wheel and move forward... with a footnote.  I will be making sure the wheels are removeable.  That way I can backtrack and do the upgrades at a later date if I want to (and I do).

Before deciding to fix the wheel, I ended up peeling off the "tire", intending to break the rim apart and start the from scratch rebuild.  After deciding to repair the wheel "as is", I decided that this removal was fine to do, it gave me an idea how hard or easy it would be to tear down the wheel later.  It wasn't too hard, but did require some patience.


I called it a night last night, after repairing the (long) broken wheel.  Four wheels with spokes again, for the first time in yeeeears.


Tonight's task ended up a simple one, but crucial.  It was also something that had had me stuck - bigly.  

For such a high end kit, the wheel hubs are quite poorly made.  To the point that the center holes aren't even big enough (or round enough) for the axle shafts to go through!  For years - okay, not constantly, but several times - I'd debated how best to fix this.  Tonight I just did it.  

The fix ended up being hand drilling; starting with a bit that would go through - 4.5mm for 3 of them, a tight fit for the 4th - then 4.8mm, then the 5mm that they needed.  I had been hesitant to use power tools on these and was glad that hand drilling worked.  Thanks to Jeff for suggesting the start small and work up gradually technique.  

I really wanted to work on the project tonight, to keep up the momentum unexpectedly started last night.  I decided to stop for tonight once I saw this:


A confession - I'm not *quite* ready to be at this point.  A few other things need to be put on the chassis before the axles are attached.  However, I could not wait any longer to see the "rolling chassis".

I'm taking it slow, I'd like to work on this a bit every day (if possible).  Maybe I'll finally finish it, THIS decade?

Of course there's also the harnesses and horses and...  


(crazy laughter fades into the distance)


Sunday, February 3, 2019

January Recap

Weeeelll, my hopes to keep up (better) with blogging have not gone so well so far.  The last couple of weeks in particular, I've been dealing with some heavy depression.  The thing that kicked it off was Jeff getting his orders for us to leave Japan..  in 6 months.  I really don't want to leave. 

Of course I've known this was coming, since before we even got here, but him getting the orders suddenly made it "real".  So that, coupled with several other things, got me into a rut and I've stayed there for the most part.  Not good news in the productive/creative department, though I have been working on some things.

Here's a summary of what went on in January!

The view from the Studio for most of the month

First, back in December, I got us a dog!  His name is Joey, he is a 2-1/2 year old yellow Lab, and he is the goodest boy.  It's been quite a while since we had a young, energetic dog.

We've been going on snowy walks...


...lots...


...and lots of snowy walks.


On the way back, Joey sleeps in the car.


Jeff and I went on another snowy adventure, up to the Hakkoda mountains, not far from here.

This is one of the roads up there:


We rode the Ropeway (cable car) up to the summit of Mt. Hakkoda, thinking we'd hike around on some of the trails up top.


However, at the summit, it was what I imagine Antarctica to be like: complete whiteout conditions, HIGH wind, heavy snow, bitter cold.  Here's Jeff, looking over the snow covered, partially buried trail map.


Below was as far as we could see and it's deceptively bright and clear in this picture (which my camera auto brightened).  In reality, we couple barely see the people here.  The trails were closed, we wouldn't have dared to set out in these conditions anyway.  In this picture, you can see some of the famed "snow monsters" - trees that get covered with so much snow that they form giant lumpy shapes. 


When not out braving the snow (with and without Joey) I've been doing some gaming, sometimes with Tealight looking on.


I've also been chipping away on not one, but two Arabian costume panel sets.  I'm not as crazy about this green and blue set as I thought I'd be when I made the pattern.  Though I figure that'll make it easier to part with if I ever actually turn it into a full costume. 


Next up on the creative department, I've finally started on my MEPSA Makeover horse for this year.  You may remember Rexy, last year's project.  This time around the mold is Lady Phase.  My goal is to make her into a race horse, in a full gallop, because, that's what I do.  haha

I haven't been documenting her progress as thoroughly as I did Rexy, but so far all I've done is a few chop and heat sessions.


I pulled out my Visible Horse, who helped a bit in the creation of Rexy, to double check the bone structures inside.  One of our bathrooms is my chop shop, since I learned the smoke/fumes during dremeling sets off smoke alarms in the house.  Also it's probably a good idea to contain (and vent, via the exhaust fan) such fumes anyhow.  I do wear a respirator and safety glasses. 


In the Happy Mail department, the latest medallion from the Mystery Medallion club arrived and she is beautiful!


I've now got a pile of medallions building up.  Just recently I saw that The Jennifer Show will have medallion classes and I think this means I need to get some of mine painted!  Eventually...

On the NaMoPaiMo front, I've started prep on my project horse, but quickly became overwhelmed by how much prep she's going to need.  I really don't like prepping.  However, I'll be back to work on her later today or tomorrow. 

I think that about wraps up the first month of 2019. 

Onward!