Showing posts with label NaMoPaiMo. Show all posts

Thursday, January 1, 2026

Coming Soon: Paint Kits and NaMoPaiMo

NaMoPaiMo is coming - and so are my paint kits!

Happy New Year, everyone!

I’ve been a participant in NaMoPaiMo (National Model Painting Month) since the beginning and every year there are many first time painters who join in - which is amazing!!

Despite what some might say, you do NOT need expensive materials to create art. Most especially not to participate in NaMoPaiMo. I have been wanting to share my methods of painting and what better time than the Year of the Horse?

I paint exclusively in craft acrylics. Yep, the cheap stuff. In a rare example of tooting my own horn: my work has won many awards in live showing. Lots of NAN cards and even some championships. I say that just to say that, yes, craft acrylics can make some cool stuff! There are also other artists in our hobby that create incredible art with them!

Enough rambling, haha, here’s what I’m doing.

I’m putting together kits that include very nearly everything you’ll need to paint a horse - including instructions in the form of videos and blog posts - right here! I’m fine tuning the kits and instructions now and hope to have everything available very soon. (Possibly next week)

Each kit will come with: paint, brushes, a palette for mixing, and some other small tools I swear by. Also included will be a lightly prepped and primed stablemate.


My idea is to give someone a relatively inexpensive option to participate in NaMoPaiMo and an introduction to painting horses if this is their first time. Also, to give an introduction to this medium if you’ve never tried acrylics before.

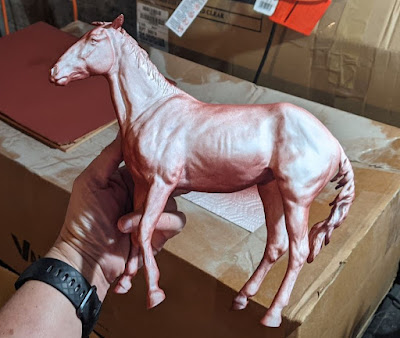
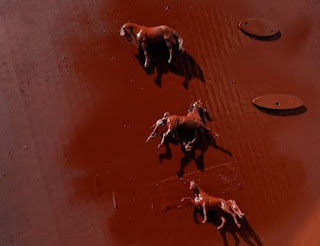
What color will we be painting? Well, since it is the year of the Fire Horse - a red chestnut! ๐Ÿ”ฅ๐ŸŽ (this is also a very simple color to do)

The number of kits available may be very limited, I only have a few put together right now. For pricing I’m thinking $30 shipped, in the US. Sorry, no international at this time as I’m not clear on the rules for shipping paint to other countries. This is an introductory offer and if it’s helpful, I may expand on it in the future.

Please let me know if you would like to take part in this introductory offering! Based on interest, I may put together a few more kits!

๐Ÿ”ฅ ๐ŸŽ ๐ŸŽจ Below are a few examples of horses I've painted with this same red chestnut color. Solid red chestnut, on a medallion I finished in July 2025:

Red chestnut with extensive pinto markings, on a resin I finished February 2025:


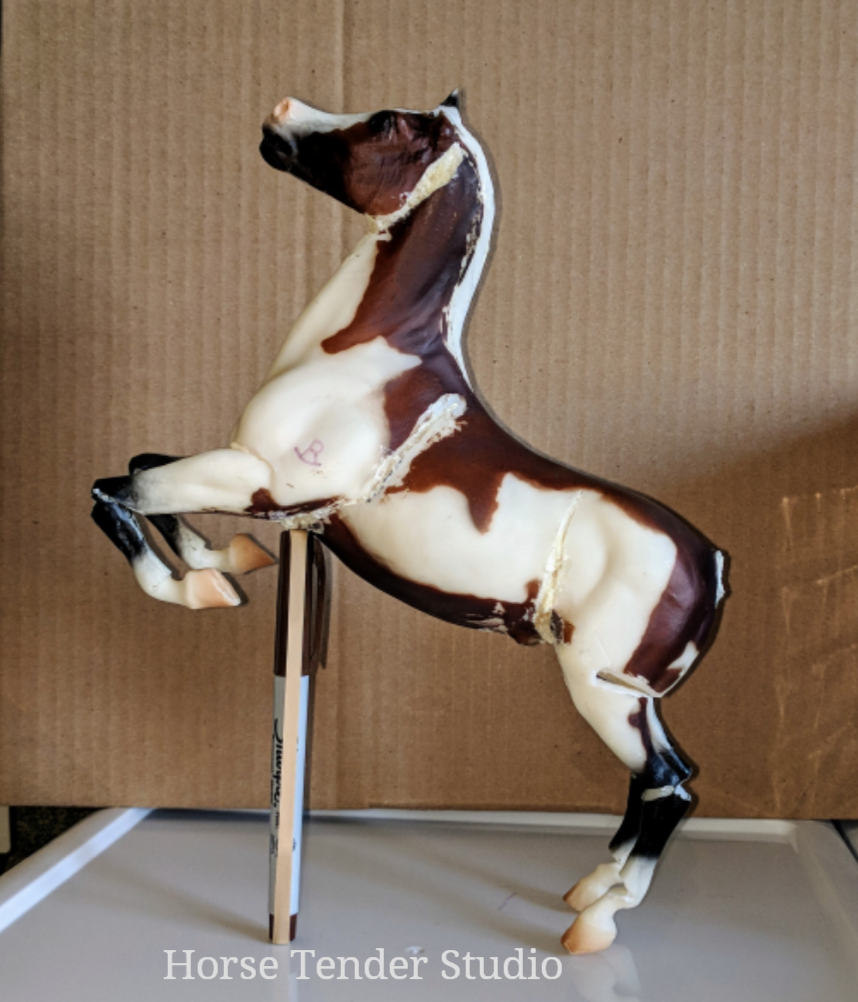
Red chestnut with tobiano pattern, on a custom Breyer I finished March 2024:


Who wants to paint a Fire Horse?

Monday, February 28, 2022

My NaMoPaiMo 2022 - Done!

Well, hey, I haven't blogged about her - or anything - since I started prep work.  Is anyone surprised?  I'm not, haha...

Reporting to you, Live from Denver, the day after BreyerWest, to say that my NaMoPaiMo horse is done!


She does not have an official name yet, but I'm thinking Ordinary Life, maybe "Ordie" for short.  Subject to change, I'm still ruminating on that.  There's a story behind it, to be expected, but that's a story for another day.

I'm happy she is done and even more: happy that I'm happy with her.  

I do have in progress pictures from along the way and would like to share them to show her progression, hopefully soon.  For now though, I'm exhausted and hungry.  Next up: either take a nap or finally eating something.  

Tuesday, February 1, 2022

NaMoPaiMo and News

Here's a bit of news from the studio for this past week or so.

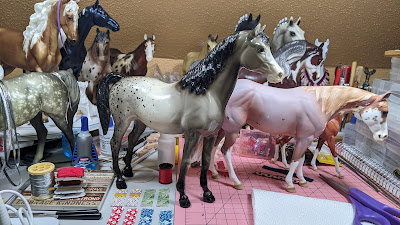
A few days ago, I wandered through a few stores in town, including an antique mall that I had forgotten about, and my favorite used book store.  In the antique mall, I found a bunch of Breyer and Heartland horses scattered around, and I ended up buying this appaloosa FAM: 


She was in the best shape of the other HSOs (horse-shaped objects) and also the lowest price.  The old Family Arabians bring back nostalgia for me.  They were among some of the, well played with, herd I was given, which started my collection.  Someday, I hope to get Starlight, the Vintage Club Yasmin in that same color. 

Other recent new arrivals are Firefly and Hawkeye, standing behind the FAM.  I had fully intended to repaint them, but they are very nice.  It's not like I don't have a ton of other projects right now, so that's far from a priority.

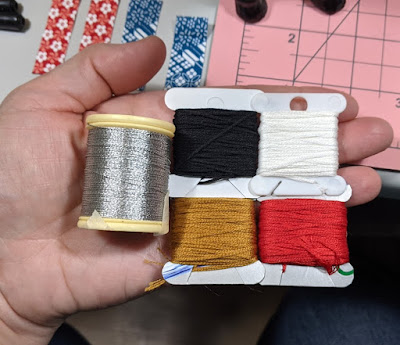
I ended up taking on a commission for a western pleasure saddle pad, using these colors of floss.


I'm very excited for this project.  The doll that it is being made to match is a favorite of mine, ever since I saw the initial post about her from the doll maker.  After creating the pattern, based on a real pad the owner likes, stitching is well underway.  

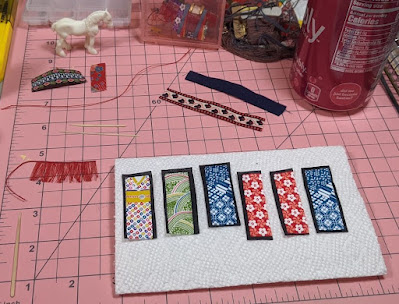
Speaking of commissions, I'm also working on the second micro mini scale Chagu Chagu Ummako (Jingle horse) set, which was ordered by a friend.


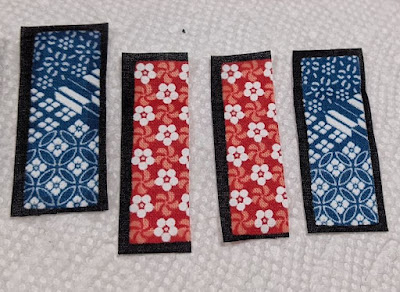
I braided more thread and made more fringe.  Also started cutting out fabric strips.  We chatted on Skype and she liked these colors, red and blue.  


On the left here is the horse this one is being made for.  He is "Robin", sculpted by Horse and Bird Studio.  On the right is the first set I made, in front of the in progress stablemate Arabian regalia set.  Which suddenly looks big here.


Another bit of news is that I signed up for NaMoPaiMo.  This is the 6th year and I've been in every one.  I actually came close to deciding to skip this one.  I wasn't sure I was up to it.  Though I'm planning to go to BreyerWest at the end of the month and could CERTAINLY use the motivation and an "excuse" to be in the studio right now.

I chose to paint a traditional resin, Yerokayannie - or "Annie", from Hanna Bear of Bear Carousel.  As soon as she had arrived here last year, I decided I wanted to paint her as an appaloosa.  In particular, a varnish roan.  This is a color I've never done before, but I think I have a plan.  

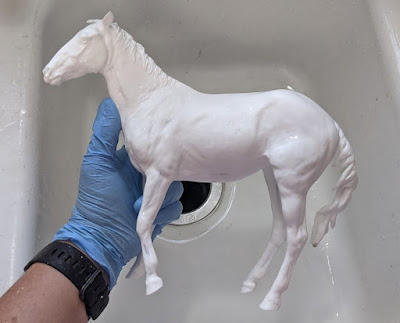
First order of business, yesterday, was a bath for her.  Well, the first was actually a bit of prep, mostly some seam sanding.  Then I decided to get some primer on her, before continuing with prep, but she needed a scrub down first.


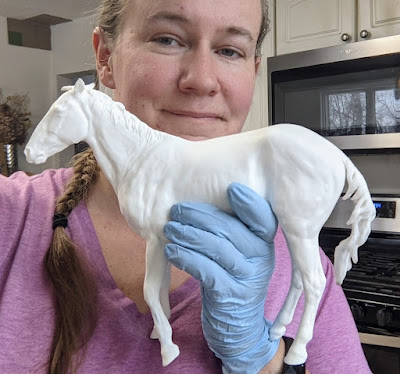
I reeeally didn't feel like doing the selfie this time around.  It's not a requirement, and I really don't like having my picture taken (by me or anyone), AND I'm perpetually tired these days.  In the end I did it anyway.  This was the best attempt, I thought.


Last night, she was primed.  This picture was after one side had been done.  


I love the effect that happens when one side is done and the lightest hint of primer spray comes around to the other side.  It's something I often take pictures of.

She's fully primed now and waiting in the studio for prepping to continue.

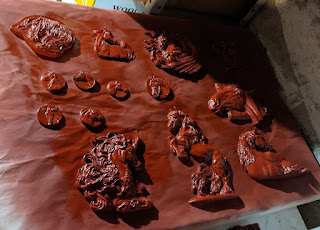
While I was at it, I decided to wash and prime a pile of medallions...
 

...and a few micro minis.  


Not the best pictures, I use the dank cellar as a spray booth.  I'm happy to have that option in the winter, the lighting just isn't great for pictures.  I may end up using a few of those as test pieces for Annie.  Most will end up being future sales pieces.

I'm happy it's (finally) February, but that means it's really time to get busy!
 

Wednesday, February 26, 2020

Sound The Bugle

I finished my NaMoPaiMo horse today.  The last year has been... hard.  I tried to focus on the good in my year in review post, but there was a lot of hard stuff too.  Such is life?  I have been grieving on different levels.  Friendships lost after a disastrous trip that was supposed to be a childhood dream come true.  Grieving leaving Japan and the friends I made there.  The distance from a people and culture that I feel aligns strongly with my values, and a place that felt safe, refreshing, beautiful, spiritual.  Our house hunt was a trial beyond words and the trial didn't stop when we finally found a place.  It's full of problems.  I could go on, but I'm still trying to stay positive through it all.  Trying.

Back to the horse, I started painting him before the middle of the month, Way early for me, the Queen/Captain of Team Last Minute - who painted her entire large Traditional scale horse on the LAST day of the first NaMoPaiMo.  This year, I was going to do it differently.  I was going to start early and venture into the exciting world of using pigments.  A solution to really the only downside of acrylics - difficulties blending.

On the 14th I talked to my Granny, the woman who raised me.  She wasn't feeling well, but said she'd be okay in a couple of days.  I told her I loved her.  On the 16th, she passed suddenly.  I have been feeling utterly destroyed.

For a week I couldn't attempt to create anything.  I thought surely "making" would help me.  A love of creating things is one of the biggest things I got from Granny.  But I couldn't do it.  I sat at my desk, moved paint bottles around, and cried.  Day after day.

Two days ago, I thought that I should come up with a meaningful name for my NaMoPaiMo horse, just in case I could pull up out of the downward spiral in time to finish him.  I spent an evening searching various inspirations, nothing clicked.

That night, in the shower, I started humming a song from Spirit: Stallion of the Cimarron.  The more I thought about it, I realized he had a name.

Sound The Bugle

Well, then I had to get him finished.  Yesterday, I sat down, took a deep breath, started mixing paints, and he started coming to life.

Today, after another emotional breakdown, followed more ridiculous drama with the house/our neighborhood (guns are involved), I put on some upbeat pop music and finished painting.


Sound The Bugle
Bryan Adams


Sound the bugle now
Play it just for me
As the seasons change
Remember how I used to be

Now I can't go on
I can't even start
I got nothing left
Just an empty heart

I'm a soldier, wounded so I must give up the fight
There's nothing more for me
Lead me away
Or leave me lying here

Sound the bugle now
Tell them I don't care
There's not a road I know
That leads to anywhere

Without a light I
Fear that I will stumble in the dark
Lay right down
Decide not to go on

Then from on high
Somewhere in the distance
There's a voice that calls
Remember who you are

If you lose yourself
Your courage soon will follow
So be strong tonight
Remember who you are

Yeah, you're a soldier now
Fighting in a battle
To be free once more
Yeah, that's worth fighting for


Wednesday, June 5, 2019

Closet Studio

What's this?  A blog post???  Yeah!

-----------------

Well...  today (and yesterday) was (were) the day(s).

The movers came and took ALL of our stuff. 

Almost.

I've been chronicling the "impending doom" on my Facebook page.  For example: how - this time - I decided to pack ALL of my horses myself, after what happened on the way here.  I've added MOAR horses to the herd while here, some of them expensive (for me).  Though I'm quite sure the Japanese movers would have taken much more care with them (we've had multiple people tell us that we will have nothing missing or broken after leaving Japan and I fully believe that).  The Japanese inspector who stopped by early also assured us that everything would be carefully wrapped in paper.  As much respect as the Japanese people have for others and their belongings, again, I totally believe that.  However, in the interest of saving time for them, I still decided to wrap all of the horses myself. 

After all of the pony packing, the last two days were spent split between hanging out in the backyard with Jeff, Joey, and Tealight (trying to stay out of the way of the moving crew), and running to get food for the crew.  That's not something that's required, but most people do it.  We had donuts for breakfast, pizza for lunch the first day, chicken today, with lots of water and other drinks.  I had fun playing hostess.

The few days before they arrived were spent in a flurry of purging trash, scrap wood from the laser business, and so on.  I also gave MUCH thought to what I wanted to keep back to prepare for...  The Jennifer Show! 

Yes, I am entered!  I've also got an AirBnB booked for a whole week there!  I'm super excited and am using the show as a carrot on a stick to leave Japan.  I really, really don't want to leave and I've been struggling with that - a lot.  But seeing my boy Bo again and TJS are what I'm looking forward to.  We were originally supposed to leave Japan in September of this year, which had me dismayed due to my long game plan to enter TJS.  So now, we are leaving in early July which means losing a couple of months here, but the show is a GO.

I gave a ridiculous amount of thought to what I might want to work on over the next three months until I'm likely to see everything else again.  Typical for me (ugh), though I've been planning to enter for THREE years now, I'm not ready.  Let's be honest, I never would be.  I didn't want to bite off more than I could do (another of my specialties?) but there is a LOT I'd like to do:

*  Make MOAR custom horses

*  Paint more of my Artist Resins, since NaMoPaiMo has helped me end my resin painting fears

*  Oh, and, show performance for the first time - with tack/props that I've made...

(sigh)

I made my final selections, piled them in one of our bathrooms (the "safe" place from the movers) and waited out the last two days of pure CHAOS.

Just now, I finished setting up my new Closet Studio.

Behold!


I've kept back:

Top shelf: my best (old) Stablemate customs (in the white boxes on the left) along with Reckless (of course) my costume model PAM, a CollectA, and Little Bit Arabian. 

Middle shelf: Wind In Her Hair (NaMoPaiMo 2019), Antar (NaMoPaiMo 2017), Bom Bidi Bom (NaMoPaiMo 2018), Bolya (OF), Ashley (custom CAM), and PreFlight (was supposed to be my MEPSA makeover horse this year...) several Classic and SM bodies - plastic and resin.

I've also kept some essential supplies, tools, and references to work on: custom horses, Arabian costumes, tack, and the STAGECOACH.

I'm happy with how my "mini studio" came together and I'm hoping that the next few weeks until we leave will be productive!

----------------

Oh...  in other (related?) news...  I am currently being evaluated for...  ADHD.  Would any of my readers think I have it?  Ha...  It's another story (another post?), but I'm hopeful that these next few weeks will see some changes.  I don't have the distractions of all of the rest of our "stuff" here.  The laser is gone, so no business tasks to be done there..  AND if I do end up going on some sort of meds, I've been told they could give me "energy and focus".  Um, wow...  if that actually happens, things could get very interesting.  I'm not in a rush to get on pills, but I am tired of feeling like I'm spinning my wheels - in 20 different directions all the time.  The doctor I spoke with said it sounds like this has really been holding me back and I'm capable of so much more.  I almost started crying.

We'll see.

That's the latest!  I'm hoping to blog a bit more in the coming months.  Surely more often than once every 4 months? 

Whew, if you made it this far: Thanks for reading.  *hugs*


Monday, January 7, 2019

2019 Custom Horses To Come

This isn't so much of a "New Year's Resolution" list as it is just me wanting to get all of these organized on a list and I thought: why not share it?  

The first batch are those with deadlines, afterwards are some lose ideas I've got rattling around at the top layer of the bottomless pit of ideas...


MEPSA Makeover 
Deadline: February 15th
The mold for this time is Lady Phase.  My idea is for her to be a racehorse, full gallop, because, why not?  Is she started yet...?  Hahahahaha...  no.


NaMoPaiMo
Start: February 1st
Deadline: February 28th
I'll be painting my Kitty Cantrell Chincoteague Pony mare resin as a palomino tobiano.  She needs quite a bit of prep..  I really should get going on that.


MEPSA Mini Contest
Deadline: March 31st
I think I'll most likely do a couple for this, but no idea yet who.


Meows And Minis 
Deadline: early August
I wanted to donate some custom minis last year, but didn't.  This year I'd like to do at least one.


Others, non deadline:


Copy Cat Custom
I've loved the idea of this since I first heard about it, but have not yet started my own.  Here's the Facebook group for it: The Copy Cat Custom Project.


Talbuk
A fun idea I've had for a little while and something I've been thinking about a lot lately.  A Talbuk is an antelope-like creature in World of Warcraft.  Several of them have been made into mounts that the player can ride and one of those (the white one pictured) is my favorite ground mount for my main character.  I've always loved the way they look and I worked long and hard on the quest chain that allowed purchase of the mounts as soon as I could.


Original Sculpture(s) 
I have a large classic Thoroughbred stallion in the works - barely started, been that way for years...


Many, many years ago I started a SM scale cutting calf.  Would like to maybe work on that again.


Possibly I'll try to do a medallion or two?


Smoky, started for ICEE
Ah yes, my ICEE project who was not to be....  I had put a coat of primer on him after this picture, contemplated doing a rush job to finish him, decided no.  So he's in the holding pattern herd.


Nameless, faceless, hordes
Then there's, um, the fact that I'll be back stateside this summer/fall and finally able to go to some shows again.  (!!!!!!!!!!)  I reeeeally want to have a fresh new show string and not keep trotting out my oldies.  I love them, but... I sorely need some new faces in the herd.


That does mean that right in the middle of all of this, life will be uprooted by another big 'round the world MOVE and most all of my horses, supplies, and so on, will be in transit for a few months.

I really need to plan ahead and around that.


Okay, time to stop typing, daydreaming, and get to work.  Or go take a nap.  Ha!


Tuesday, January 1, 2019

Happy 2019!

Happy New Year!

During our time here in Japan, we've tried to check out MANY cultural events.  For New Year's we've done a few different things. 

Our first New Year's here, we made the trek south to Sendai for their "Pageant of Starlight".  It was a truly magical sight: an entire city main street lined with towering trees, on either side and down the wide median in the middle, that were completely covered with tiny white lights. 

In another year, we went to a large Shinto Shrine to bring in the New Year.  That year we also experienced what ended up being the national shopping day, similar to "Black Friday". 

As this New Year approached, we had talked about what we should do this time.  We considered another trip to Sendai.  However, it is a long way away and, most notably, very expensive to go there on the toll road (the only real "interstate" type highway.  Neither of us were thinking we'd do that again.  We wanted to do something, but what?

I had an idea.

A couple of years ago, I came across the Japanese tradition of seeing the first sunrise of a New Year.

I'd already mentioned to Jeff that I'd like to go see a sunrise at the beach this winter.  It would be our last chance to catch a sunrise at a more reasonable time here.  During the summer, the sun is up by 4am.  Seriously.   

So, I proposed that for our last New Year's here, we should go see the first sunrise.

Yesterday, we went to our friends' house and had a great time, eating, playing games, and laughing until our sides hurt.  We didn't come home until about 10.  Last night, admittedly, I was second guessing my idea of getting up early, in the dark and cold, to go stare at the horizon...

But, we did it!  (and I'm so glad)

Here's what the sky looked like shortly after we arrived at the beach:


Interestingly, the colors faded and stayed that way for a little while.  I worried that we'd actually missed the sunrise?


Oh wait, what's that?


There it is!  Hello, sun.


We watched as it moved behind a cloud, which seemed perfectly positioned.  As it neared the top, the cloud was so bright and we could see the rays spreading across the sky. 


It's all the way up, too bright to look at now.


Time to head back up the beach. 


When we first arrived, one car had just beat us there.  On the walk back, Jeff said "look at all the cars!"  The section of beach where we and the other car had parked had turned into a parking lot.  We saw many people out to catch the first sunrise. 

On the way home, I got a text from my friend Jennifer. 


I had a good laugh at that.  Last year, I had messed around, asking where the signup page was, on January 1st, over here.  If you didn't know, we are a day ahead - a fact that I've had a lot of fun with at times.

Okay, okay, let's see...

As soon as we got home from the beach, I went to the studio to consider my options. 

I hadn't actually narrowed down my choice of model or color -at all- but invigorated from just spending a couple of hours out at the beach, I thought it would be fitting to (finally) paint my Chincoteague Pony mare resin.  After all, it would be great to get some pictures of her here on the beach before we go...


For color, I ended up choosing palomino tobiano, which is terrifying.  Not so much the tobiano part, I don't think... but the palomino bit.  Despite loving palominos and buckskins, I've always found them a massive challenge and very intimidating to paint. 


I filled out the entry form, sent off my entry fee, and made a quick post to the NaMoPaiMo Facebook page all jumping the gun, before those in the U.S.


And with that, I'm committed!  Or, maybe I should be...  Heh. 

Jeff, Joey, and I weren't the only ones who enjoyed the sunrise this morning.  I found Tealight basking in the glow of it in our upstairs hallway. 


After all of that excitement, I crashed on the couch for a couple of hours. 

Happy New Year!  ;)  I hope it's a good for you.  :)

Here is another article about Japanese New Year traditions, if you'd like to learn more: New Year in Japan


Monday, April 16, 2018

Super Informal Catchup Vlog

Yeah, I think all of my vlogs are "informal" - haha!  Anyhow, I decided to finally stop prepping stuff and do a nighttime video.  I'm hoping to do another one (in the daytime) in the next few days.

Also, this weekend is the Sakura (cherry blossom) Yabusame (traditional Japanese horseback archery) competition!  I will be taking a ton of video and pictures as usual and am hoping to do an actual vlog from there - if I can remember...  This whole video thing is still really new to me!

Without further ado, here's the latest video!  (the thumbnail is funny to me:  Look at Van Gogh!  Look at him!!)


I hope everyone is having a good start to the week!  :)

Tuesday, February 28, 2017

I Did It

The cry of triumph on the NaMoPaiMo Facebook group when one finishes their model is: "I did it!"  


It took me all the way up until the last day, but..  I did it!  I worked off and on at his prep work all month and painted him on..  the last day.

I'm happy, and relieved, to present Antar ("hero, strong one, warrior").  He is an "Anubis" resin, sculpted by Sheri Rhodes and painted by me.


The other thing I accomplished is a presentation set for him.  This is, officially, the very first completed piece of Arabian tack that I've done.  


I'd like to eventually do write up on here about Antar's creation; I took a bunch of pictures during the 12 hour painting session yesterday.  However, I couldn't wait to share him on here.


Friday, February 10, 2017

Tutorial: Hand Painting With Craft Acrylics

Disclaimer: The pictures in this post do not show me creating a LSQ horse or anything considered good quality.  I grabbed an unprepped blank stablemate as my model, and skipped several steps that would be done in my regular work (in addition to prep).  I wanted to focus on technique and tips and get this tutorial out ASAP to anyone who might want to use some of these ideas for their NaMoPaiMo project.  ;)

-------------------------

Way back when I first put paint on a horse, I used cheap craft acrylics, I think it was most likely Apple Barrel brand.

I've come a long way, learned a lot, won lots of NAN cards and even a small handful of live show championships and reserves...

... and I am still hand painting, with cheap craft acrylics.

One of these days I'd like to be brave and try other mediums (airbrush, pastels, maybe even oils), but for now, craft acrylics are still my jam.

It can be hard to find tips on how to work with them.  It seems they are something a lot of people start with and then move on to other things.  I never did.

Here's a quick list of pros and cons about using them:

Pros:
Fast drying - you can finish an entire horse in one session, if you want to.
Cheap - usually around $1-$1.50 or so for each color
Easy to find - about any place that sells craft supplies: a dedicated craft store, or even WalMart.
Easy clean up - soap and water clean up, no need for potentially harsh chemicals
Thin with water - again, no need for chemicals

Cons:
Fast drying - Yes, I listed this as a Pro as well, however: makes it hard/impossible to blend colors together on the model.  There are products such as drying extenders that can slow the drying time and possibly allow for more blending, but I have not used any of them.
Can't really be sanded, can be hard to touch up smoothly if nicked
Delicate finish, easily scratched - however, a good coat or two of spray sealer fixes this and they are actually quite durable with a good clear coat over the top


Tools:

Here are the tools that I use:


A horse to paint
Brushes
Makeup sponges
A pallet or something to mix paint on/in
Flat toothpicks to mix paint
Paper towels, for cleaning brushes
A cup of water to rinse brushes
And of course: paint.  I haven't found any issue with mixing various brands of craft acrylic together - ceramacoat, americana, folkart, apple barrel, they all seem to work together just fine.

Also helpful: instructional material, be it physical or digital (I prefer real books).


For color mixes, I use the color cards from Carol Williams' Color Formulas and Techniques book. 


They were written for use with oil paints, but I've found that most can transfer over to acrylics, or at least offer a good starting point.  Some colors don't exist in craft acrylics - like the cadmiums and so on - that's where improvising and experimentation comes in.

It's worth noting that I also have a bajillion reference pictures, both physical and digital.  Good references are crucial!


A little more information on tools:

I use the makeup sponges to apply my (thin) base coats for the first time.  I also use them to do dark shading over the body color, and to apply white over large areas, such as on an appaloosa.  I use the triangular makeup sponges, cut down into smaller pieces, since I tend to do mostly minis.  Even on larger horses, I want to work with smaller amounts of paint, so I'd still use small sponge pieces.

Here's how I cut them down:

Original sponge.

Cut in half.

Each half cut in half, lengthwise.

After cutting the pieces down, I like to round the corners on the widest end - the one I'll be using.

Small wedge piece on left, rounded corners on right.

What this does is prevent harsh edges when you are applying paint and also keeps paint from building up in the corners of the sponge and being applied where you don't want it.

I don't really have any tips on brushes.  I, uh, use cheap ones there too.  I still have the same set of brushes that I started with a long time ago.  They are nothing fancy, but they work.  Every now and then a hair may come out, but overall they've held up great over the years.  Though I've added more (cheap) brushes to the collection, this is still my go to set.


Along the way I've created a couple of "specialty" brushes (haha).  The one on the left is a 000 that has had probably half of its bristles pulled out.  It is my dedicated tiny detail brush, most often used for eyes on the mini models.  On the right is a 1 that has had its bristles cut off.  I use that for dry brushing, "scrubbing" paint into some areas.


Oh, one brush note: you want to use a flat brush on larger areas (such as the body).  Round brushes can work on legs, manes and tails, and for dry brushing the shading into nooks and crannies, but it is hard to get the paint smooth and even over a broad area with a round brush.  


Other notes on technique:

Less is more.  I try to work with small amounts on paint on the model at any time.

The lighter the color of acrylic, the thicker they are.  White is the thickest; it can't be used without thinning it down - I use water.  Black can usually be used straight from the bottle.  Keep this in mind with your mixes too, a lighter colored mix may need thinning, darker mixes may not.

Since acrylic dries so fast (a plus, I think), it's good to work fast - "get in and get out".  I do my best to smooth an area as fast as I can and then leave it alone to dry.  If you keep messing with it as it dries and gets tacky, you will get brush marks.  If you do end up with a blob of paint (too much), just do your best to spread it out smoothly, quickly, and let it dry.

When using a brush, I try and go in the direction that hair grows on a real horse, it's just something that makes sense to me.  If there is a tiny brush mark or something, it could be "hair".  I don't know if that makes any sense, but it's what I've always done.

Okay, enough blabbering - let's (sort of) paint a horse!

To apply all of that, I work in "zones".  For example: left side - head, neck, shoulder, front leg (outside), barrel (feathering into the back and belly), hip, rump, back leg (outside), and so on.

I try to feather the paint at the borders between zones; don't stop abruptly and leave a blob of paint - that can leave bumps or ridge lines when everything is dry.  I do the left side first, then the right.  By that time, the left side is dry and ready for another coat, and around you go.

I usually do each side and then do a pass down the back, then the chest, belly, and inside of the legs.  If more is needed, then I repeat the process: left, right, top, bottom.

Here's a quick series of photos, to better describe the zones:

Head

Neck

Shoulder and down the outside of the front leg.

Barrel, feathering/fading into the back and belly.

A pause to show the top view.

Hip and rump

Outside of back leg

Top view

Right side
As you might have noticed, I don't worry about getting into the creases with my sponge; I'll get to them when I use a brush.  I like to do my base coat with a sponge, then I switch to a brush and repeat the whole zone process, until the horse is covered.

Your piece of sponge will get soaked with paint, I like to switch out fairly often, when it seems like it's holding too much paint (even after dabbing some off) another way to check is when the pores of the sponge are getting larger.  Then it's time to use a new one.


The good news is, you can actually use the same little wedge of sponge a few times.  Just cut off the end,


round the corners and you're good to keep going.  I generally use each piece 2-3 times this way.


One thing I forgot to mention in my preferred tools are these.  I believe they are french fry trays?  I bought a whole bag of them at a restaurant supply store a looong time ago, they make great disposable pallets.


The main reason I use them is below.  Here I'm getting ready to do some shading.  I put a bit of my paint in the corner, dab in my sponge, then dab most of the paint off.  I'm sure there are many other items you can use this way, but these trays are what I like to use.


I tend to do darker shading with a sponge again,  Here's a picture of some quick and dirty sponge shading on our tutorial model.  Again, I'm certainly not trying to make a nice horse here, ha!


If I could reiterate one piece of advice, over and over: use SMALL amounts of paint in anything that you do.  You can always add more, to make it darker or cover more of the horse.  However, if you use too much, you're kind of stuck.  Acrylic is not forgiving that way.  Once it's on there, it's on there and there's really no way to get it back off, without messing up more of your work (I know, I've tried).  If you do end up with too much paint, the best thing to do is spread it out as smooth as you can, let it dry, then paint back over it with your body color and try again.

To do the lighter shading, usually in tighter areas like the flank, behind the elbow, chest, muzzle, etc., I prefer to use a small brush, because it offers much more control in tight places.  I'll dab a (tiny!) bit on and work it in.


Black legs 

A particular challenge (since you can't really blend acrylics on the model) is the black or dark legs on a bay or buckskin horse, particularly where the black or dark brown color fades into the body color.  I have a two brush technique for doing that and it works well.


These are the brushes I use,  The first one really isn't all that important, anything will do, though I do prefer a small round brush for this.  The real hero of my technique is the stiff-bristled brush on the right.  This is pretty much the only thing I use it for.


If I'm using straight black, I'll just work from the cap.


Here's how I hold the brushes.  You don't have to do it this way, you could apply the paint with one and pick up the other, but in the interest of working fast and doing this before the paint starts to set up, this is how I do it:


What I do is dab the tip of my small round brush into the paint (small amounts, people!  I know, I sound like a broken record...)


Then dab some paint onto the leg, I usually put it on the hoof to start.  I don't have an actual picture of that, because as soon as it's dabbed on, I start spreading it up the leg.


Once the paint is dabbed on, I use the stiff brush to dab and work it up the leg, sort of brushing backwards.


I'll keep at this, until I have the dark color as high as I want it and (hopefully) well faded into the body color.  That's not so much the case here, trying to work over a rough sponged base layer.  ;)


The potential of the technique is probably much better shown off here.  This is a closeup of Crown Royale, my old G1 ASB custom who still does okay in the shows.  ;)


I hope all of this helps!  If you have any questions on working with craft acrylics or anything I've talked about here, please let me know.