As warned in yesterday's post, there are a LOT of pictures here (50 or so)!
 |
| Could also be a warning for the amount of pictures that follow! |
The goal was "simple": create a custom horse from the Breyer Traditional scale Clydesdale Mare for the MEPSA Makeover Challenge.
All entered horses are donated to MEPSA for fundraising for prizes for their HUGE International Championship show every summer. All entries will be put up for voting on the MEPSA blog, with the winner being given a traditional unicorn resin, Kilimanjaro.
I had looked at a lot of pictures of draft horses, feeling quite sure I wanted to do an action pose and a "drastic" custom. Aside from that, I had no ideas in the beginning.
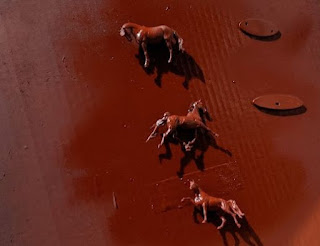
One picture stopped me in my tracks, so to speak. This was the picture:
 |
| Original photo credit unknown |
I can't explain what I liked so much about it, other than it was a big, heavy horse flying across the ground. I also liked that it wasn't either of the phases of a trot that are usually portrayed: a knee lifted or all legs mostly straight. This pose really brought to my mind the impression of speed and power.
So that picture became my main reference picture. Later I found pictures of the same trot from the other side which helped in the positioning for that side.
On Christmas Day, I donned a respirator, shut myself in the bathroom for a couple of hours, and gave my 20-year-old Dremel a workout.
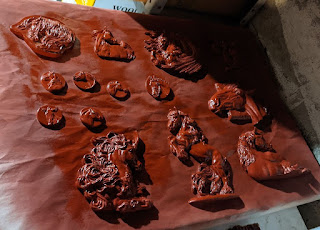
The debris:
The results of that Dremel marathon:
In the past when I've done drastic customs, I've always tried to preserve as much plastic as possible. This time, however, I decided to draw some inspiration from
this blog post from
Bluebird Studio. While I didn't cut away as much as she did with the model in her post, the large triangular sections that I removed were with her tips in mind.
On New Year's Day, I got out the heat gun:
Much more heat gun, Dremel, heat gun action would follow in the days and weeks to come.
Somehow I don't have pictures of when I moved the stifles, but that was when her pose really started to work.
Also drawing inspiration from the Bluebird Studio blog post, I decided to try something I'd been curious about for years now. I used spray foam insulation to fill the hollow horse.
Here she is, looking like some sort of modern art sculpture. Or a horse that had a run in with the Stay Puft Marshmallow Man.
I tore off the excess foam and got my first look at her without the big holes.
Next, the epic sanding efforts began. This mold has a bit of a rough texture all over and I wanted to smooth that out. (despite the fact that finding a Belgian Brabant in slicked out condition seemed not possible). I started The Great Sanding by going over her with Dremel sanding wheels.
Then The Great Epoxy process began. Here was the first time (of a few) that I used a rubber band as a bit of traction while epoxy cured.
Another time was when I dug out some of the foam which had pushed the off side shoulder forward. I used some CA glue and a few rubber hands to push it back where I wanted it.
MOAR epoxy! Here filling in that shoulder and starting to bulk up the hind legs. I had loosely thought of her as a Brabant and here decided to make it official when I started beefing up her legs.
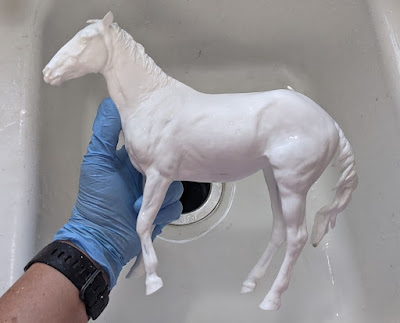
I gave her her first bath and.. her head popped off. At that time, it was only attached at the poll with a thin bit of a plastic and a tiny bit of epoxy. After the bath and drying, she got her first coat of spot putty. Here I'd already started sanding her back and barrel when I realized I should get a picture.
Both sides were laboriously hand sanded. She was a true multi-colored (headless) wonder at this stage.
It was also now that I had drilled holes for pegs in her near side hooves. I'd gone back and forth about using rods or a base. I really liked the idea of a base, where she would have just the one hind foot anchored, the rest airborne -
flying along. Unfortunately the complexity and uncertainty of how to make a (sturdy) base in a limited time frame meant I went with pegs.
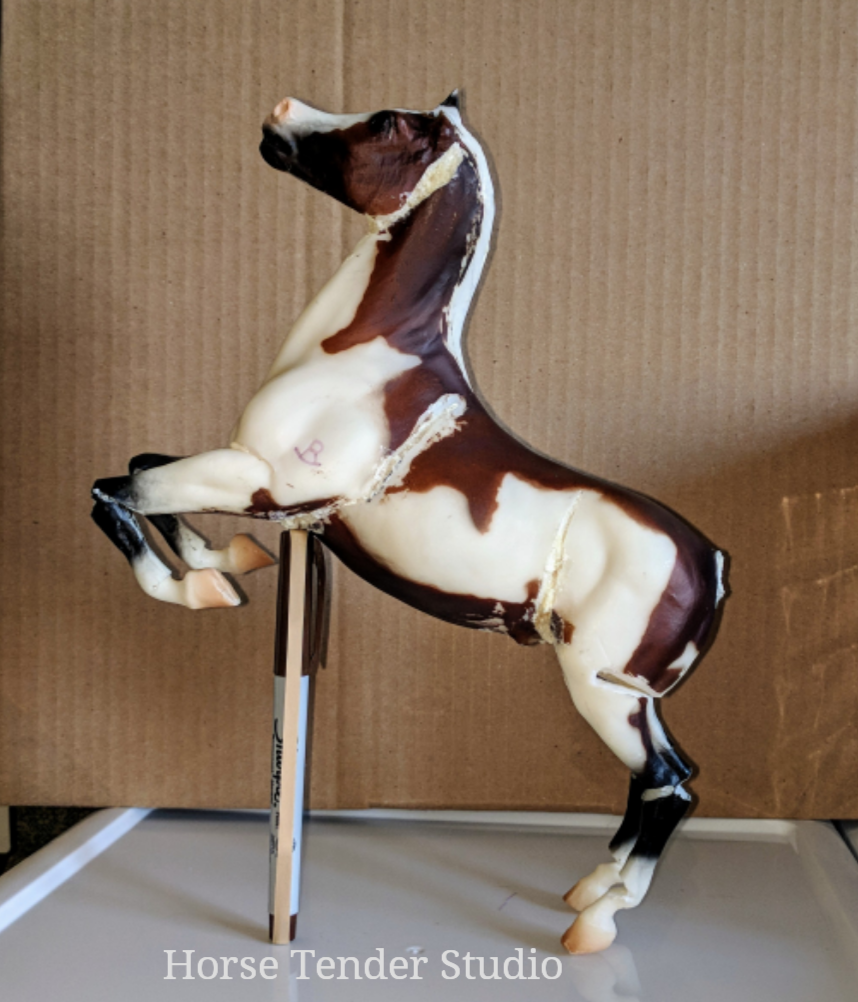
She was upright again! And I could now work on both sides, instead of laying her on one side or the other and waiting for things to dry.
I wasn't that upset about her head falling off, because I wanted to give it some detailing and attention and wasn't sure how exactly to go about doing that when it was attached to a model that was getting heavier and more awkward. So I did some fine carving and sanding on her noggin and here it is with a fresh coat of primer.
Then it was time for me to tackle another part that terrified me (there were many). This one was sculpting the feathers - a first for me. I think I've only (badly) sculpted hair once before, many years ago. This was another drop kick out of my comfort zone. I anxiously sculpted the first two legs...
Followed by the other two. She also got a tailbone.
I did another coat of spot putty and another round of sanding.
Then it was time to put her head back on.
That was the part that drove me into a bit of a fit of rage and frustration. I tried three times and three times it failed. It got to the point where I was ready to throw everything across the room.
Jeff stepped in with some ideas and she ended up with a head again - and thankfully not thrown across the room. I also added a bit of flair on her outstretched front hoof, "fluffing" up some feathers there.
First solid coat of primer. I was really scared to see what it would reveal.
I was pleasantly surprised to see that my efforts with the sanding, filling, and sanding again appeared to have paid off. Her overall texture was quite smooth. There were still several rough areas that needed attention, mostly around the epoxy fill work.
More sanding and carving and then it was time to give her a mane and tail. (scary!) This was another decision I spent some time on. Loose and flowing or braided up for show? Docked tail or natural length? In the end, I decided to go braided for show, with a long tailbone. I found a few good reference pictures and set off to slap more epoxy on.
Here she is with her mane and tail. I would add ribbons after she was painted.
I did one last round of (precision) spot putty, applied with a flat toothpick to the problem areas still remaining.
Once those were dry and sanded down, she got one last coat of primer and then...
PAINT!
I chose "Golden Mahogany Bay" from Color Formulas and Techniques" and the color above was the body color mix. I... didn't like it. I had found some good pictures in my reference library and that base just didn't look right at all.
Here was where everything caught up with me. Progress came to a grinding halt and I didn't paint for a couple of days. It felt like the whole thing was a string of obstacles I had to figure out along the way (which was expected). Painting is the hardest thing for me to do and it's so odd, because... I love it. When I'm putting paint on a horse, it is such a happy time for me. But I have this big mental block that I have to push through to get started.
Tuesday at lunch time (t-minus a day and a half before the deadline) I broke down crying and told Jeff that if I didn't finish this, on time, I was going to be so disappointed in myself.
I think just admitting that, out loud, must have helped break the log jam, because after lunch I suddenly realized - if I don't like the color formula, why not make my own? It was a silly realization, I'd made plenty of my own color mixes back when I was doing a lot more of this on a regular basis. I was fearless when it came to paint mixing back then.
Sending this picture to my friend Holly, who knew I was struggling to keep going, I typed: "It's GO time!"
I took a good look at my reference pictures and my paint and started experimenting. Here was the body color that I came up with.
My idea for her color in the beginning was a rich, dark, dappled bay. Along the way, I'd found many pictures of bay Brabants, but none with dappling. A bit of a last minute search on my old laptop, now stationed in my studio as a movie player and quick digital reference display, found a picture of a dappled bay Brabant. His winter coat meant I couldn't entirely trust the colors, but between him and the page from one of my reference binders, I compared placement of darker areas as I started shading (with a custom made mix).
Along the way I decided to do a quick coat of black on her legs, mane, and tail, to better show how her overall look was coming along.
This picture, taken at about midnight, Tuesday night/Wednesday morning shows her with a fresh coat of sealer. I decided to triage what I could get done versus what I wanted to do (certainly not the first time I did just that on this project). For her color, I got the richness I was after, with some darker shading, but that's where I stopped. I had to get her detailed and sealed that night, so that I could get her ribbons on and pictures taken the next day, and mail her out the following day. My reference pictures have shading all the way into black, and the dappling. I just ran out of time.

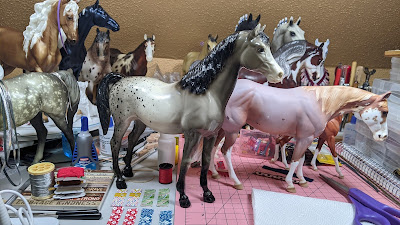
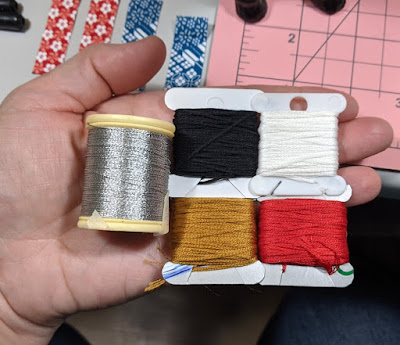
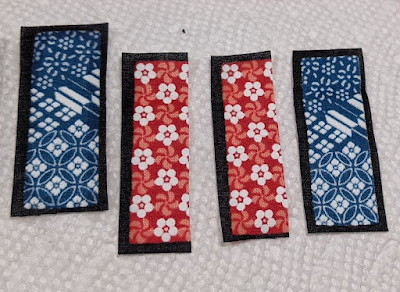
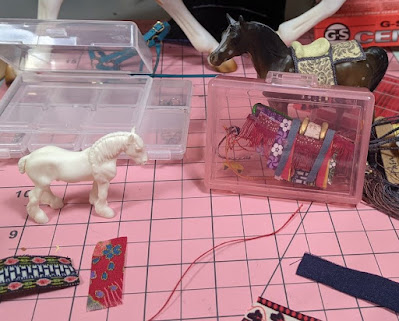
The next morning, it was time to figure out how I wanted to put on her ribbons. I had braided them during a round of odd jobs in the previous days (feather sculpting, tailbone building, and so on). I decided on these three colors, which seem to be used on many braided up Brabants. I learned they are the colors of the Belgium flag (I suspected, but didn't know!). For me, they represent something else.. more on that in a bit.
Here she is in the daylight, that next morning, awaiting her ribbons. When I sculpted her parted mane, I pressed the ribbon into the sides, leaving an impression of it for attachment later. I think that worked really well.
I carved some lines in either side of her mane and down the top of her tail, tied off and trimmed all of the ribbon pieces, and solved my last problem. All Brabant horses seem to have a raffia-looking material attached to the mane ribbon at the withers, which hangs down. I saw it on every picture of one with a braided mane, but had no idea how to replicate it, until the last hours of the last day. The idea that saved the day and ended up working perfectly and looking amazing was... yarn. I used some thin yarn, of about the right color, and unraveled it.
Whew!
Not much time to celebrate, we had to go to the beach! Another of my goals for the project was to take my official pictures of her at the beach. In winter this can be a challenge.
She and I braved the weather, got right down by the cold northern Pacific and took her glamour shots (complete with a crashing wave in this first one):
The morning she would ship out, I thought I'd take a bunch more pictures of her in the studio, but... I didn't. Honestly, I think I was afraid I'd get too attached if I spent too much time with her. Is that silly? I did decide to document something I thought would be fun: a weigh in.
 |
| OF Clydesdale Mare: 14.55 ounces |
 |
| CM Brabant: 1 pound 2.45 ounces |
I really thought she would weigh more. I could feel her getting heavier as time went by and would not have been surprised if she added a pound. Nope, just about 4 ounces! The foam insulation fill probably kept the weight down I would think.
One more fun comparison:
Remember I said there was another meaning to those three colors in her ribbons? Well, to me they are the colors from Jurassic Park. I'm a huge Jurassic Park fan. It inspired me in so many ways, even in creating more and more things (remind me to tell about the duct tape dinosaurs). In watching a trailer for the new Jurassic World movie, I saw in the comments that someone said "Rexy" better survive this movie too. The T-Rex in Jurassic World is the same T-Rex from the original Jurassic Park movie and she's been through a lot! The scene in JP of her breaking through the fence, stepping out on the road, and roaring is my absolute favorite in the original movie. I thought it would be funny to name my big, charging Brabant "Rexy" and... I did.
The more I thought about it, the more it just fit. Like the T-Rex, this girl is BIG - says me, who's usual preferred scale is micro (or smaller) to Stablemate. She was very scary, but... cool. Something completely new and exciting for me, and also terrifying.
I decided Rexy was the perfect name for her, even though she wouldn't be staying...
The last obstacle presented was not having a box large enough to ship her in. So it was a rush to the store, measurements in mind, rush home, pack her (along with a couple of Etsy orders) and head to the post office.
 |
| Safe travels, big girl |
Since she's left I find myself feeling... strange. Sad? Relieved? Drained? For the past six weeks she's been a priority, never far from my thoughts as I mulled over how the heck I was going to accomplish the next step, and then the one after that. I guess in the end, I struggle to say what she and the whole process really meant to me. I've decided to decompress for a few days and then launch in more projects (and finish them!)
One last picture. During the quick trip to the beach (just before more snow blew in) I had to get a picture of her that shows her "in Japan". This was the best she and I could do - ha!
Thank you for all that you taught me, big girl. I hope you travel well and find a good home down the line.